Travel Smart: How to Protect Your iPhone & Yourself from Overseas Scams | MacWorks 360
Travel Smart: How to Protect Your iPhone & Yourself from Overseas Scams
You’ve booked the flights, planned the itinerary, and packed your bags. But here’s what most travelers overlook until it’s too late: your iPhone becomes a high-value target the moment you step off that plane. Whether you’re exploring Barcelona’s Gothic Quarter or closing a deal in Singapore, international travel creates a perfect storm of opportunity for scammers—unfamiliar surroundings, language barriers, urgency, and your reliance on that device in your pocket for everything from navigation to payment.
The statistics tell a sobering story. Travel-related fraud attempts spike by over 300% during peak tourism seasons, and iPhone users are disproportionately targeted because thieves know these devices hold the keys to your digital kingdom: banking apps, email, photos, contacts, and increasingly, your ability to get home safely. But here’s the good news: iPhone travel security doesn’t require a degree in cybersecurity. It requires fifteen minutes of preparation and a handful of smart habits that become second nature once you understand the landscape.
This isn’t about paranoia. It’s about traveling with the same confidence you’d have at home—because when your device security is locked down, and you can spot the red flags, you’re free to focus on what matters: the experience itself.
Key Takeaways
- Enable Stolen Device Protection before you travel—it’s Apple’s most powerful anti-theft feature and takes two minutes to activate.
- Most overseas scams exploit urgency and unfamiliarity, not sophisticated hacking; recognizing social engineering tactics stops 80% of attacks.
- Your “lost iPhone” playbook matters more than prevention—knowing the exact order of steps (Lost Mode first, then cards, then carrier) minimizes damage.
- Public Wi-Fi is rarely the most significant threat—smishing texts, QR code scams, and SIM swaps cause far more harm to travelers.
- Recovery keys improve security but require safe storage—they’re optional and not recommended for travelers who might lose access to their backup methods.
Why Travel Scams Spike Abroad (And Why iPhone Users Are Targeted)
When you travel internationally, you enter what security researchers call a “high-context vulnerability window.” You’re jet-lagged, navigating unfamiliar systems, often dealing with language barriers, and making dozens of micro-decisions under time pressure. Scammers have spent years optimizing their approaches for exactly these conditions.
iPhone users face a unique risk profile. The device itself signals affluence in many markets, making it a target for theft. More critically, iPhones have become the central hub for modern travelers—boarding passes, hotel confirmations, payment methods, two-factor authentication codes, and emergency contacts all live on that single device. Lose access to it, and you’ve lost your ability to navigate, communicate, pay, and prove your identity.
Overseas scammers also exploit the fact that you’re disconnected from your standard support systems. Your bank’s fraud department is asleep when you’re awake. Your mobile carrier’s customer service doesn’t have local offices. The police report you file in Prague won’t immediately sync with your credit card company in Portland. This coordination gap creates a window for criminals to move quickly while you’re scrambling to catch up.
According to border security protocols updated in 2024, agents can conduct both basic manual searches and advanced searches with external equipment under “reasonable suspicion” of national security risk—and can retain copies of device information for up to 15 years[1]. This reality makes pre-travel data minimization not just a privacy preference, but a practical necessity for business travelers and creative professionals carrying client work.
The psychology matters too. Travelers experience what behavioral economists call “decision fatigue”—after making hundreds of choices about flights, accommodations, and logistics, your mental defenses against manipulation drop. A scammer who approaches you with a “helpful” suggestion at precisely the right moment of confusion can bypass skepticism that would stop you cold at home.
The 3 Biggest Risk Categories: Device Theft, Digital Scams, and Real-World Tourist Traps
Understanding the threat landscape helps you allocate your attention appropriately. Not all risks deserve equal worry.
Category 1: Physical Device Theft
This is the nightmare scenario—someone grabs your iPhone and runs, or you set it down for “just a second” and it vanishes. In major tourist cities like Barcelona, Rome, and Paris, organized theft rings specifically target smartphones in crowded metros, tourist attractions, and outdoor cafés.
The good news? Apple’s Stolen Device Protection feature, introduced in iOS 17.3 and refined in subsequent updates, has fundamentally changed the game. When enabled, it requires biometric authentication (Face ID or Touch ID) for critical actions like changing your Apple ID password or turning off Find My—and adds a mandatory one-hour security delay when you’re away from familiar locations[2]. A thief who steals your phone can’t immediately lock you out of your account, even if they somehow observe your passcode.
Category 2: Digital Scams (Smishing, Phishing, Network Attacks)
These attacks don’t require physical access to your device. Instead, they trick you into handing over credentials, downloading malware, or authorizing fraudulent transactions. The travel context makes these scams devastatingly effective because:
- You’re expecting legitimate messages about bookings, flight changes, and reservations
- You’re more likely to click “urgent” links when you’re worried about missing a connection
- You’re connecting to unfamiliar networks and systems, making malicious ones harder to spot
- You’re often using translation apps and services, creating opportunities for man-in-the-middle attacks
The most successful travel scams exploit your legitimate need for information at precisely the moment you’re most vulnerable to manipulation.
Category 3: Real-World Tourist Traps (Cashless Payment Scams, Social Engineering)
These are the hybrid attacks—part digital, part human interaction. A “helpful” stranger offers to take your photo and runs with your phone. A merchant rushes you through a contactless payment that charges 10x the actual price. A QR code on a parking meter leads to a fake payment portal that harvests your card details.
What makes these particularly insidious is that they feel helpful in the moment. The person offering assistance, the “official-looking” QR code, the rushed checkout process—all designed to bypass your critical thinking by triggering compliance reflexes.
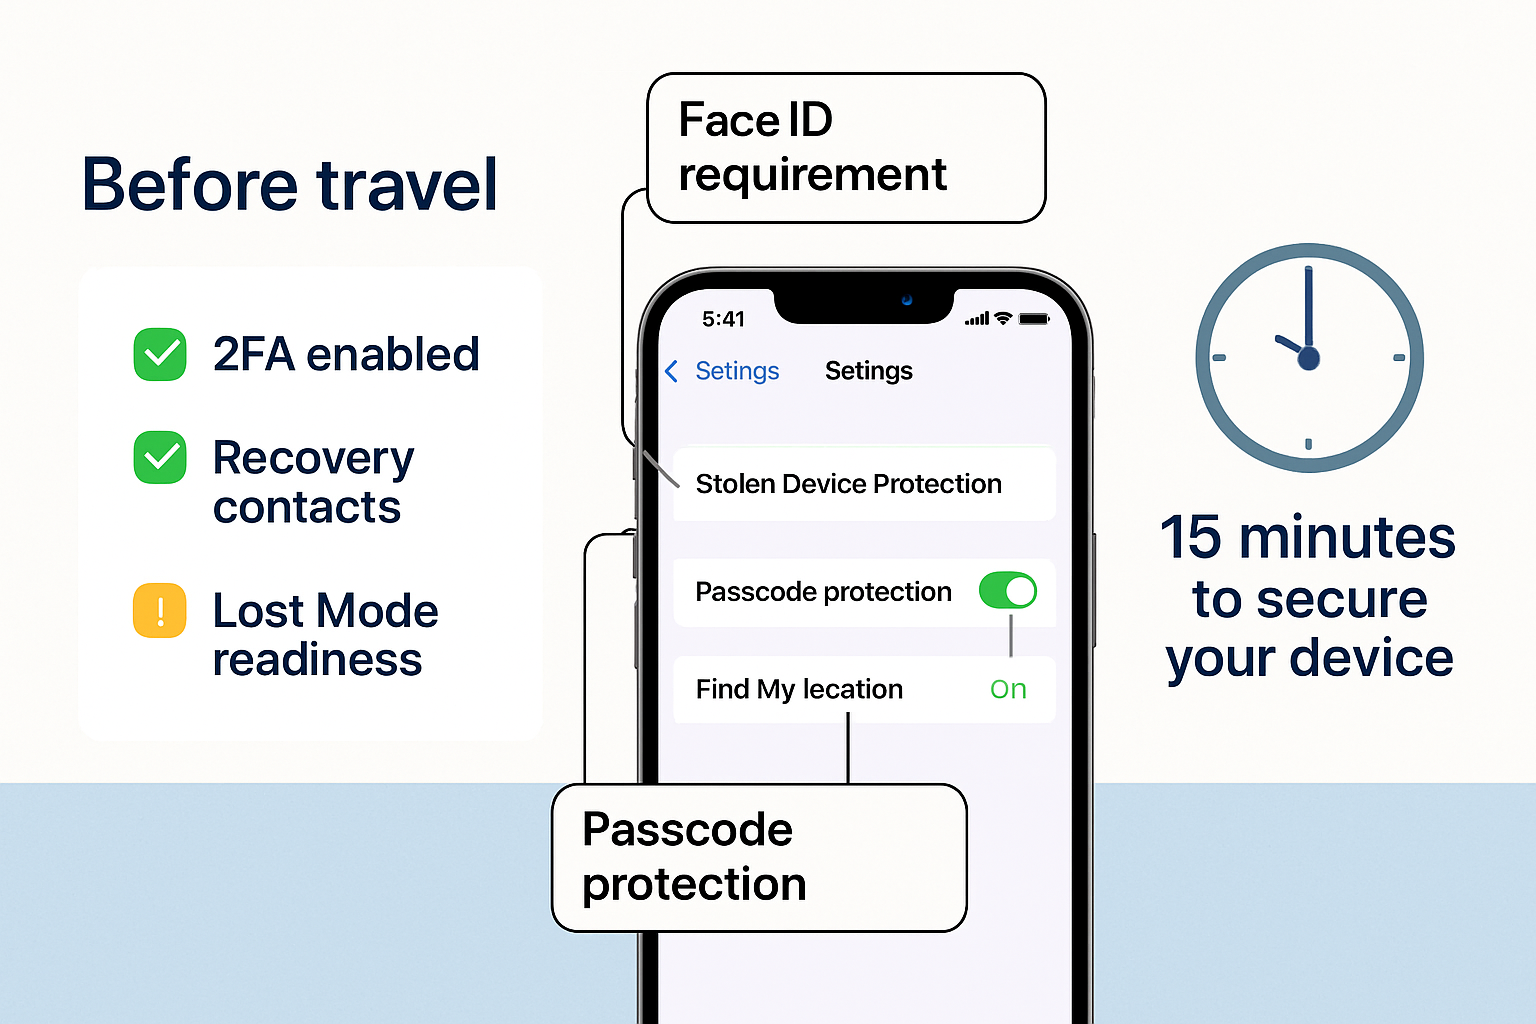
Before You Fly: iPhone Travel Security Hardening Checklist (15 Minutes)
This section is your pre-flight security sprint. Fifteen focused minutes before you travel will prevent 90% of the headaches that plague underprepared travelers. Treat this like your pre-flight safety check—non-negotiable and systematic.
Turn On Stolen Device Protection
This is the most critical security setting for travelers, yet it’s not enabled by default.
Here’s how to activate it:
- Open Settings → Face ID & Passcode (or Touch ID & Passcode)
- Enter your passcode
- Please scroll down to Stolen Device Protection and toggle it ON
Once enabled, this feature requires Face ID or Touch ID for sensitive actions when you’re away from familiar locations (like your home or office). It also adds a mandatory one-hour security delay for critical account changes—even if someone has your passcode, they can’t immediately lock you out[3].
Why this matters for travelers: If your iPhone is stolen and the thief somehow observes your passcode (shoulder surfing is everyday in crowded tourist areas), they still can’t change your Apple ID password, turn off Find My, or access stored passwords without your biometric authentication. The one-hour delay gives you time to mark the device as lost remotely.
Confirm Find My + Lost Mode Readiness
Find My is likely already enabled, but you need to verify the settings are optimized for emergencies.
Verification checklist:
- Open Settings → [Your Name] → Find My
- Confirm Find My iPhone is toggled ON
- Enable Find My network (allows your device to be located even when offline)
- Turn on Send Last Location (automatically sends your iPhone’s location to Apple when the battery is critically low)
Test your access now, not when you’re panicking in a foreign country: Open the Find My app or visit iCloud.com/find and confirm you can see your device on the map. Make sure you know your Apple ID password by heart—you’ll need it to access Find My from another device.
Pro tip for business travelers: If you’re using a company-issued iPhone, notify your IT department before international travel. Security monitoring systems often flag international logins as suspicious activity and may lock your account at precisely the wrong moment. At MacWorks 360, we proactively configure travel exceptions for clients’ managed devices to prevent this scenario.
Apple Account Security: 2FA and Recovery Planning
Two-factor authentication (2FA) is non-negotiable, but the type of 2FA matters when you’re traveling.
Current best practice:
- Use authentication apps (like Apple’s built-in system or third-party apps) instead of SMS codes whenever possible
- SMS-based 2FA is vulnerable to SIM swap attacks, where a criminal convinces your carrier to transfer your number to their device.
- Add trusted phone numbers for family members or colleagues who can help if you lose access to your account.
The recovery key decision: Apple offers the option to generate a recovery key—a 28-character code that replaces account recovery through Apple Support. This significantly improves security, but comes with a critical tradeoff: if you lose both your device and the recovery key, you’re permanently locked out of your account[4].
Our recommendation for travelers: Only use a recovery key if you have a secure, accessible backup system—like a password manager you can access from multiple devices, or a trusted family member who stores it securely. If you’re not confident in your backup plan, the standard account recovery process (which uses trusted devices and phone numbers) is safer for most travelers.
Lock Screen Settings to Reduce Shoulder-Surf and “Passcode Theft” Risk
Thieves in tourist areas have refined the art of observing passcodes. They watch you unlock your phone in a crowded metro or café, then steal the device minutes later. With your passcode, they can access a surprising amount—unless you’ve configured these settings:
Immediate actions:
- Use an alphanumeric passcode instead of a simple 4- or 6-digit PIN (Settings → Face ID & Passcode → Change Passcode → Passcode Options → Custom Alphanumeric Code)
- Reduce Lock Screen information exposure: Settings → Face ID & Passcode → scroll to “Allow Access When Locked” and disable Wallet, Return Missed Calls, and Reply with Message.
- Enable “Require Attention for Face ID” (Settings → Face ID & Passcode) to prevent anyone from unlocking your phone while you’re asleep or distracted.
Additional hardening: Consider reducing the auto-lock time to 30 seconds (Settings → Display & Brightness → Auto-Lock) so your phone locks quickly if you set it down.
The Most Common Overseas Scams That Hit iPhone Users (And How to Spot Them)
Knowledge is your first line of defense. These scams work because they exploit patterns you’ve learned to trust. Once you know what to look for, they become apparent.
“Your Flight/Hotel/Booking Changed” Smishing + Fake Support Numbers
You receive a text message: “Your flight BA2847 to London has been canceled. Click here to rebook immediately or call our 24-hour support line.” The link looks legitimate, the flight number matches your itinerary, and you’re panicking because you have a connection to catch.
This is smishing—SMS phishing—, and it’s the most successful travel scam of 2025.
How it works:
- Scammers scrape booking information from data breaches, social media posts, or even public Wi-Fi networks at airports
- They send messages timed to coincide with your travel dates
- The link leads to a fake airline or hotel website that harvests your login credentials and payment information
- The “support number” connects you to a fraudulent call center that convinces you to provide sensitive information
How to spot it:
Legitimate airlines and hotels send booking changes through their official apps first, not random SMS
Never click links in unsolicited travel messages—open the official app or website directly
Check the sender’s phone number—if it’s a random string of digits or an international number you don’t recognize, it’s suspicious.
Look for urgency language—”immediate action required,” “limited time,” “account will be suspended”—these are manipulation tactics.
What to do instead: If you receive a message about a booking change, open the airline or hotel’s official app directly (not through the link) or call the number printed on your original confirmation email.
Public Wi-Fi Traps: Evil Twin Networks and Captive Portal Tricks
You’re at Charles de Gaulle Airport in Paris, and you see a Wi-Fi network called “CDG-Airport-Free-WiFi.” You connect, accept the terms on the captive portal page, and start checking your email. You’ve just handed a criminal access to everything you do online.
Evil twin attacks create fake Wi-Fi networks with names that mimic legitimate ones. The captive portal page (the login or terms page that appears when you first connect) can be designed to harvest credentials or install malware.
The reality check: Public Wi-Fi is less dangerous than most people think for basic browsing, but it becomes genuinely risky when you’re entering passwords or accessing sensitive accounts. The bigger risk is that travelers lower their guard because “everyone uses airport Wi-Fi.”
Safe connectivity rules:
Use cellular data for anything sensitive—banking, password changes, work email
If you must use public Wi-Fi, never enter passwords or access financial accounts
Turn off auto-join for Wi-Fi networks (Settings → Wi-Fi → tap the (i) next to any network → disable Auto-Join) so your iPhone doesn’t automatically connect to familiar-sounding network names
Verify network names with official signage or staff—ask at the information desk for the exact network name
VPN expectations: A VPN encrypts your traffic and hides your activity from the network operator, which is valuable. But it doesn’t protect you from entering credentials into a fake website, and it won’t stop you from downloading malware if you click a malicious link. VPNs are one layer of protection, not a silver bullet[5].
QR Code Scams (“Quishing”) in Public Places
QR codes have exploded in popularity post-pandemic, and scammers have adapted. You’ll find malicious QR codes on:
- Parking meters (leading to fake payment sites)
- Restaurant menus (redirecting to credential-harvesting pages)
- Tourist attraction posters (promising “exclusive discounts”)
- Rental bike/scooter stickers (overlaid on legitimate codes)
The attack is elegant: You scan the code, it opens a website that looks legitimate, you enter payment information or login credentials, and the scammer captures everything[6].
How to protect yourself:
Preview the URL before opening—iOS shows you the web address after scanning; if it looks suspicious (random characters, misspelled domain, unfamiliar URL shortener), don’t tap it
Never enter payment information directly from a scanned QR code—go to the official website or app instead
Be especially suspicious of QR codes on stickers—legitimate codes are usually printed directly on official materials, not stuck over existing signage.
For parking and payments, look for official apps—most major cities have them that are safer than scanning random QR codes.
SIM Swap and Phone-Number Takeover Risk
This attack is sophisticated but increasingly common. A criminal contacts your mobile carrier, impersonates you (using information from data breaches or social media), and convinces the airline to transfer your phone number to a SIM card they control.
Why this matters: If you use SMS-based two-factor authentication, the attacker now receives your security codes. They can reset passwords, access accounts, and lock you out—all while you’re overseas and can’t easily contact your carrier.
Warning signs:
Your phone suddenly loses service (no signal, “SIM not provisioned” errors)
You receive notifications about SIM changes you didn’t initiate
You can’t receive calls or texts, but data still works (if you’re on Wi-Fi)
Prevention strategies:
- Contact your carrier before traveling and add a PIN or password requirement for account changes
- Switch to app-based 2FA (authenticator apps) instead of SMS codes wherever possible
- Consider using eSIM for international travel instead of activating your US phone service—this reduces exposure and makes SIM swap attacks harder[7]
- Monitor your accounts actively—if you notice unauthorized access attempts, assume your number may be compromised.
If you’re traveling with a company device: Your IT team should have carrier-level protections in place. At MacWorks 360, we configure managed devices with carrier PINs and restrict SIM changes to prevent precisely this scenario.
Cashless Payment Traps: Fake POS, “Tap Here” Scams, Rushed Checkout
Contactless payment is convenient—and that convenience creates opportunities for fraud. Common scenarios:
- A merchant uses a modified point-of-sale terminal that charges your card multiple times or for inflated amounts
- A “helpful” person at a market or taxi stand offers to help you pay, then substitutes their own payment terminal
- You’re rushed through checkout and don’t notice the amount charged is 10x the displayed price
The psychological component: Scammers create a sense of urgency and confusion. They speak quickly, gesture emphatically, and make you feel like you’re holding up the line. Your natural response is to comply and move on—exactly what they’re counting on.
Protection tactics:
Always verify the amount on the terminal before tapping—don’t let anyone rush you
Watch the transaction complete—make sure you see the confirmation before walking away
Use Apple Pay instead of physical cards when possible—it generates one-time transaction codes that are useless if intercepted.
Check your transaction history daily while traveling—catch fraudulent charges early.
Set up real-time transaction alerts with your bank so you’re notified immediately of charges.
If something feels off, walk away. Legitimate merchants will wait while you verify the amount. Scammers will pressure you to hurry.
Social Engineering and “Helpful Stranger” Tactics
These attacks use human psychology, not technology. Common scenarios:
- Someone offers to take your photo and runs with your phone
- A “police officer” asks to see your phone to “verify your identity.”
- A friendly local offers to help you buy Metro tickets using a machine, then swaps your card during the transaction
- Someone creates a distraction (spills something, points out a “problem”) while an accomplice steals your device
The pattern: Authority, urgency, helpfulness, or confusion. These trigger compliance without conscious thought.
Counter-tactics:
Maintain physical control of your device—use a wrist strap or keep it in a secure pocket, not a backpack
Be skeptical of unsolicited help, especially around ATMs, ticket machines, and payment terminals
Legitimate authorities don’t need to hold your phone—they can verify information while you hold the device
Trust your instincts—if an interaction feels rushed or pressured, create distance and reassess
Safe Connectivity Rules While Traveling
Connectivity is non-negotiable when you’re traveling—you need maps, translation, booking confirmations, and communication. The question isn’t whether to connect, but how to do it safely.
When to Use Cellular vs. Wi-Fi
Cellular data is almost always safer than public Wi-Fi because it’s encrypted end-to-end between your device and the carrier. The tradeoff is cost—international roaming can be expensive, though many airlines now offer affordable international plans or day passes.
Our recommendation:
- Use cellular for anything sensitive: banking, password changes, work email, file uploads
- Use Wi-Fi for low-risk activities: reading news, streaming entertainment, general browsing
- Please verify you have adequate cellular coverage for your destination before relying on it
Cost management: Most US carriers offer international day passes ($10-12/day for unlimited data in many countries). For longer trips, consider a local SIM card or eSIM service like Airalo, which provides data-only plans at local rates.
VPN Expectations: What It Helps With and What It Doesn’t
A VPN (Virtual Private Network) encrypts your internet traffic and routes it through a server in another location. This provides real benefits:
Hides your activity from the Wi-Fi network operator (useful on public networks)
Encrypts traffic on unsecured networks (adds a layer of protection)
Can bypass geographic restrictions on content (though this violates some services’ terms)
What a VPN does NOT do:
Doesn’t protect you from phishing or malicious websites—you can still click a bad link
Doesn’t prevent malware downloads—if you install something malicious, the VPN won’t stop it
Doesn’t make public Wi-Fi completely safe—it’s one layer, not a complete solution
May slow down your connection—routing through distant servers adds latency
When to use a VPN while traveling:
- When accessing public Wi-Fi for sensitive tasks (though cellular is still preferable)
- When you need to access work resources that require a VPN connection
- When you’re in a country with restrictive internet policies
When it’s unnecessary:
- On cellular data (already encrypted)
- On trusted hotel Wi-Fi where you’re using HTTPS websites (the padlock in the browser)
- For casual browsing where you’re not entering credentials
VPN selection matters: Free VPNs often monetize by selling your browsing data—precisely what you’re trying to protect. If you need a VPN for travel, use a reputable paid service (NordVPN, ExpressVPN, ProtonVPN) or your company’s enterprise VPN if available.
Turn Off Auto-Join and Be Deliberate About Networks
Your iPhone’s convenience features can become security liabilities when traveling.
Critical settings to adjust:
- Disable auto-join for Wi-Fi networks: Settings → Wi-Fi → tap the (i) icon next to each saved network → toggle OFF “Auto-Join.”
- Turn off Wi-Fi when you’re not actively using it—this prevents your phone from automatically connecting to malicious networks with familiar names.
- Forget networks you no longer need: Settings → Wi-Fi → tap the (i) icon → “Forget This Network”
Why this matters: Your iPhone remembers networks you’ve connected to and will automatically rejoin them when detected. An attacker can create an “evil twin” network with the same name as a legitimate one (like “Starbucks WiFi”), and your phone will connect automatically, assuming it’s the same network you used before[8].
The deliberate approach: When you need Wi-Fi, manually select the network from the list and verify it’s legitimate (check with staff, look for official signage, compare with other travelers’ connections). This adds five seconds to your routine but eliminates a significant attack vector.
Money and Booking Protection: Simple Rules That Prevent 80% of Travel Fraud
Financial fraud ruins trips. These rules are simple but remarkably effective.
Rule 1: Use Credit Cards, Not Debit Cards
Credit cards offer superior fraud protection. If a fraudulent charge appears, you dispute it, and you’re not out any money while the investigation proceeds. With a debit card, the money is immediately withdrawn from your account, and recovery can take weeks.
Additional credit card benefits for travelers:
- Many cards offer travel insurance, trip cancellation coverage, and rental car insurance
- Fraud detection systems are more sophisticated
- You can freeze/unfreeze cards instantly through mobile apps
- Liability is typically capped at $50 (often $0) for fraudulent charges
Rule 2: Set Up Real-Time Transaction Alerts
Every major bank and credit card issuer offers instant transaction notifications. Enable them before you travel.
You’ll receive a push notification or text within seconds of any charge. This allows you to:
- Catch fraudulent charges immediately (while you’re still in the area)
- Confirm legitimate charges that might otherwise look suspicious
- Freeze your card instantly if you see unauthorized activity
Rule 3: Never Pay for Travel Bookings Through Unsolicited Links
This is the single most common way travelers lose money.
The safe approach:
Type the website address directly into your browser (don’t click links in emails or texts)
Use official apps for airlines, hotels, and booking platforms
Verify the URL is correct—look for https:// and the exact domain (not a misspelling or lookalike)
Book through platforms with buyer protection (credit card, PayPal, major travel sites)
Red flags for fake booking sites:
Prices are significantly below the market rate.
Pressure to “book now” or to “limited availability” due to “limited availability.”
Requests for payment via wire transfer, gift cards, or cryptocurrency.
Poor grammar, spelling errors, or unprofessional design.
No verifiable contact information or physical address.
Rule 4: Document Everything
Take screenshots of:
- Booking confirmations with confirmation numbers
- Receipt emails
- Payment confirmations
- Correspondence with vendors
Store these in a secure location you can access from multiple devices—such as iCloud Drive or a password manager —or email them to yourself. If you need to dispute a charge or prove a booking, you’ll have immediate evidence.
Rule 5: Know Your Bank’s International Policies
Before you travel:
- Notify your bank and credit card companies of your travel dates and destinations (many allow this through mobile apps)
- Confirm international transaction fees—some cards charge 3% foreign transaction fees; others don’t
- Know how to reach fraud departments from overseas (save international contact numbers, not just 1-800 numbers)
- Understand dispute processes and timeframes—you typically have 60 days to dispute charges, but faster is better[9][10]
If Your iPhone Is Lost or Stolen Overseas: Do This in Order

Speed and sequence matter. Here’s your emergency playbook.
Step 1: Mark as Lost / Activate Lost Mode (Immediately)
This is your first action, before anything else.
How to do it:
- From another device: Go to iCloud.com/find or use the Find My app on another Apple device
- Sign in with your Apple ID
- Select your missing iPhone from the device list
- Click “Mark As Lost” or activate “Lost Mode.”
What this does:
🔒 Locks your device with your passcode (even if it wasn’t locked before)
🔒 Disables Apple Pay on the device (your cards can’t be used)
🔒 Displays a custom message on the lock screen with a contact number
🔒 Tracks the device’s location and sends you updates when it moves
🔒 Prevents anyone from accessing your data without your passcode
Critical detail: You can activate Lost Mode even if your iPhone is offline. The command will execute as soon as the device connects to any network[11].
If you have Stolen Device Protection enabled (which you set up before traveling), the device is even more secure—the thief can’t turn off Find My or change your Apple ID password without biometric authentication and a one-hour delay[12].
Step 2: Secure Apple Pay and Financial Cards
Lost Mode automatically disables Apple Pay on the device, but you should take additional steps:
- Contact your bank and credit card issuers to report the cards as potentially compromised
- Freeze or cancel cards if you’re concerned about fraud (many banks allow instant freezing through mobile apps)
- Monitor transactions closely for the next several days
Important: Even if your phone is stolen, Apple Pay uses tokenization—merchants never see your actual card numbers. The risk is lower than if your physical wallet were stolen, but vigilance is still warranted.
Step 3: Address Your SIM/eSIM
If you’re concerned about SIM swap attacks or unauthorized use of your phone number:
- Contact your mobile carrier and report the device as lost or stolen
- Request that they suspend service to prevent unauthorized calls or data use
- Ask about SIM lock or account security PIN to avoid transfers of number
- If using eSIM, request that it be deactivated on the lost device
For international travelers: If you purchased a local SIM or eSIM for your trip, contact that provider as well. You may be liable for charges until you report it.
Step 4: Report to Authorities and Carriers
File a police report in the jurisdiction where the theft occurred. This serves several purposes:
- Required for insurance claims
- Creates an official record for your employer (if it’s a company device)
- May help with device recovery in rare cases
What to include in the report:
- Device description (model, color, storage capacity)
- Serial number and IMEI number (find these in your Apple ID account online: appleid.apple.com → Devices)
- Circumstances of the loss/theft
- Approximate location and time
Report the device to your carrier (if you haven’t already) and request that they blacklist the device’s IMEI. This prevents it from being activated on their network, though it won’t stop international use.
Step 5: Assess Recovery vs. Replacement
Be realistic about recovery chances. In most cases, a stolen iPhone in a foreign country is gone permanently. Lost Mode may help if someone finds it and wants to return it. Still, professional thieves will attempt to bypass Activation Lock (unsuccessfully) and eventually discard or part out the device.
Your decision points:
- If the device shows a location in Find My: Assess whether it’s safe and practical to attempt recovery (usually not—don’t put yourself at risk)
- If it’s offline: It may never come back online, or may appear briefly when the thief attempts to activate it
- If you have AppleCare+ with Theft and Loss: File a claim (requires Find My to have been enabled and the device to be in Lost Mode)[13]
Remote erase option: You can erase your iPhone remotely through Find My, which deletes all data. Only do this if you’re sure the device won’t be recovered, because once erased, you can’t track its location anymore. Lost Mode is usually sufficient protection—your data is encrypted and inaccessible without your passcode.
“Travel Smart” One-Page Checklist
Before You Leave (15 Minutes)
Enable Stolen Device Protection (Settings → Face ID & Passcode)
Verify Find My is active and Send Last Location is on
Confirm you know your Apple ID password by heart
Switch to app-based 2FA instead of SMS where possible
Add a recovery contact or verify that the recovery key is safely stored
Set up alphanumeric passcode (not simple PIN)
Reduce Lock Screen access (disable Wallet, Reply with Message when locked)
Turn off auto-join for Wi-Fi networks
Enable real-time transaction alerts for all cards
Notify the bank and the carrier of travel dates
Download offline maps for your destination
Screenshot booking confirmations and store securely
Note your iPhone’s serial number and IMEI (appleid.apple.com → Devices)
Daily While Traveling
Use cellular data for sensitive activities (banking, passwords)
Verify Wi-Fi network names with staff before connecting
Preview URLs before opening scanned QR codes
Verify payment amounts before tapping the card or phone
Check transaction history for unauthorized charges
Keep iPhone in front pocket or secure location (not backpack)
Be skeptical of unsolicited help or urgent messages
Don’t click links in booking-change texts—verify through official apps
If Device Is Lost/Stolen (Do in This Order)
Mark as Lost via iCloud.com/find or Find My app
Contact banks to freeze/cancel cards
Contact the carrier to suspend service and prevent SIM swap
File police report (required for insurance claims)
Report to the employer IT if the company device
Monitor accounts for unauthorized access
File an AppleCare+ claim if you have Theft and Loss coverage
Frequently Asked Questions
Will this stop all scams?
No security approach is 100% effective, but these practices prevent the vast majority of common travel scams. The goal isn’t perfection—it’s raising the difficulty level high enough that scammers move on to easier targets. Stolen Device Protection, Lost Mode readiness, and scam awareness eliminate most opportunistic attacks.
What if I need SMS codes for two-factor authentication?
SMS-based 2FA is still widely used, and you may not be able to avoid it entirely. The key is to:
- Minimize reliance on SMS codes by switching to authenticator apps where possible
- Protect your phone number with a carrier PIN to prevent SIM swap
- Have backup authentication methods configured (backup codes, recovery contacts)
- Monitor your phone service—if you suddenly lose signal, assume a potential SIM swap and act immediately
What if my phone is offline and I can’t track it?
Lost Mode will activate as soon as the device connects to any network—cellular or Wi-Fi. Even if the thief turns off cellular, the device will attempt to connect to known Wi-Fi networks or use the Find My network (which uses Bluetooth signals from nearby Apple devices to report location, even when offline).
Your best approach: Mark it as Lost immediately, then wait. You may get a location update hours or days later when it briefly comes online.
Should I use a VPN all the time while traveling?
Not necessary. Use a VPN when:
- Connecting to public Wi-Fi for sensitive activities
- Accessing work resources that require it
- In countries with restrictive internet policies
On cellular data or for casual browsing on HTTPS websites, a VPN adds minimal security benefit and may slow your connection.
What about travel insurance for devices?
AppleCare+ with Theft and Loss covers iPhone theft for a deductible ($149 for most models as of 2025). It requires Find My to have been enabled and the device to be in Lost Mode.
Homeowners or renters insurance often covers personal property theft, including electronics, though deductibles may be high.
Credit card travel insurance sometimes covers theft of items purchased with that card—check your card’s benefits.
Dedicated travel insurance may cover electronics, but read the fine print—many have low coverage limits for individual items.
Is it safe to use public charging stations?
“Juice jacking” (malware installed through compromised charging ports) is theoretically possible but extremely rare in practice. The bigger risk is a slow charge or a damaged port.
Safer approach:
- Carry your own charging cable and wall adapter
- Use a portable battery pack
- If you must use a public USB port, use a “charge-only” cable (no data transfer) or a USB data blocker adapter
What if I’m traveling with a company-issued device?
Notify your IT department before you leave. They need to:
- Configure travel exceptions so security systems don’t flag international logins as suspicious
- Provide emergency contact information for device issues
- Confirm VPN access and remote support capabilities
- Document the device serial numbers and configuration
At MacWorks 360, we proactively manage this for clients’ device fleets—configuring international access, setting up emergency protocols, and ensuring seamless support regardless of location. It’s part of our “set it up once, travel with confidence” approach to Mac and iPhone fleet management.
Conclusion: Set This Up Once, Travel With Confidence
iPhone travel security isn’t about paranoia—it’s about preparation. The fifteen minutes you spend enabling Stolen Device Protection, confirming Find My settings, and understanding common scam patterns will pay dividends every time you travel. More importantly, it frees you to focus on the experience itself rather than constantly worrying about your device.
The landscape has shifted dramatically in the past two years. Apple’s Stolen Device Protection feature, introduced in iOS 17.3 and refined through 2024 and 2025, has fundamentally changed the theft equation. A stolen iPhone with this feature enabled is nearly useless to thieves—they can’t access your data, can’t turn off tracking, and can’t lock you out of your account. Combined with Lost Mode and Find My, you have a robust safety net.
The scams evolve, but the patterns remain consistent: urgency, authority, helpfulness, and confusion. When you recognize these manipulation tactics, you’re no longer vulnerable to them. The smishing text about a canceled flight, the “helpful” stranger at the ATM, the too-good-to-be-true booking offer—they all rely on bypassing your critical thinking. Awareness is your most vigorous defense.
For creative professionals and small business owners who manage Mac and iPhone fleets, this isn’t just personal security—it’s business continuity. A stolen device containing client work, project files, or business communications can derail operations and damage professional relationships. That’s why we emphasize proactive protection at MacWorks 360: device management that prevents problems rather than just reacting to them.
Your next steps are simple:
- Spend fifteen minutes today running through the pre-flight security checklist
- Test your Find My access so you know it works before you need it in an emergency
- Save this guide for reference (bookmark it, print the checklist, or email it to yourself)
- Share it with your team if you manage devices for others
Travel should expand your world, not shrink it through worry about device security. With these systems in place, you can explore confidently—knowing your digital life is protected, your data is secure, and you have a clear playbook if something goes wrong.
Safe travels. Your iPhone—and your peace of mind—are ready.
References
[1] U.S. Customs and Border Protection device search policies and data retention guidelines, updated 2024
[2] Apple Support: Stolen Device Protection documentation, iOS 17.3 and later
[3] Apple Support: About Stolen Device Protection for iPhone (support.apple.com)
[4] Apple Support: Recovery key guidance and account security best practices
[5] Apple Support: Wi-Fi security recommendations and network safety
[6] Canadian Centre for Cyber Security: QR code phishing (“quishing”) threat advisory
[7] NatWest and FBI consumer advisories on SIM swap fraud prevention
[8] Apple Support: Managing trusted Wi-Fi networks and auto-join settings
[9] Consumer Financial Protection Bureau: Credit card dispute rights and timeframes
[10] U.S. Department of State (Travel.state.gov): Financial safety for international travelers
[11] Apple Support: Find My iPhone and Lost Mode functionality
[12] Apple Support: Stolen Device Protection security delay features
[13] Apple Support: AppleCare+ with Theft and Loss coverage requirements