For many years, Macs have relied on sets of keys held at startup to enable specific modes. Most notably, pressing Option displays the Startup Manager and lets you pick a boot drive, Command-R starts up from macOS Recovery, Command-Option-P-R resets the NVRAM, Shift starts up in Safe mode, D opens Apple Diagnostics to check the hardware, and T starts up in Target Disk Mode. Needless to say, obscure key combinations aren’t the friendliest way to help someone who may already be stressed out about their Mac not working, so Apple improved things for the new M1-based Macs.
The most important part is that you no longer have to press a key combination during startup. Instead, press and hold the power button until the screen shows “Loading startup options…” and displays the Startup Manager.
Unfortunately, Apple is still a little fast and loose with terms, so we’ve tried to list all of the ones you might see.
Startup Manager / Startup Disk
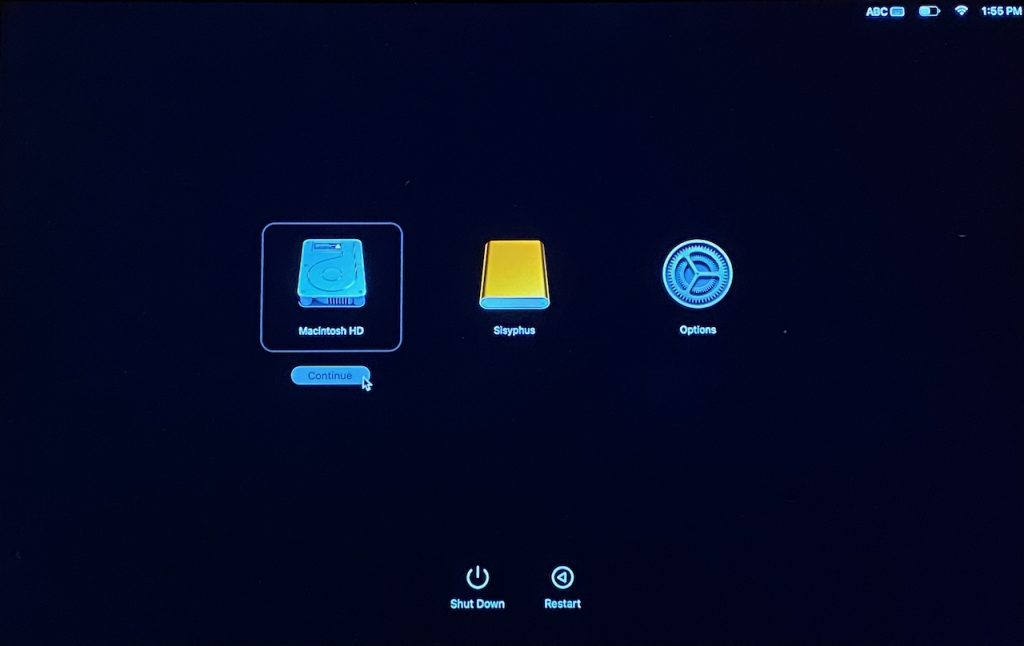
If you have multiple boot drives and wish to switch among them, you’ll want to use Startup Manager. Immediately after you see “Loading startup options…,” the Mac displays the new Startup Manager, which shows icons for all the bootable drives, along with buttons for Options, Shut Down, and Restart. To boot from a particular drive, select it and click Continue under it.
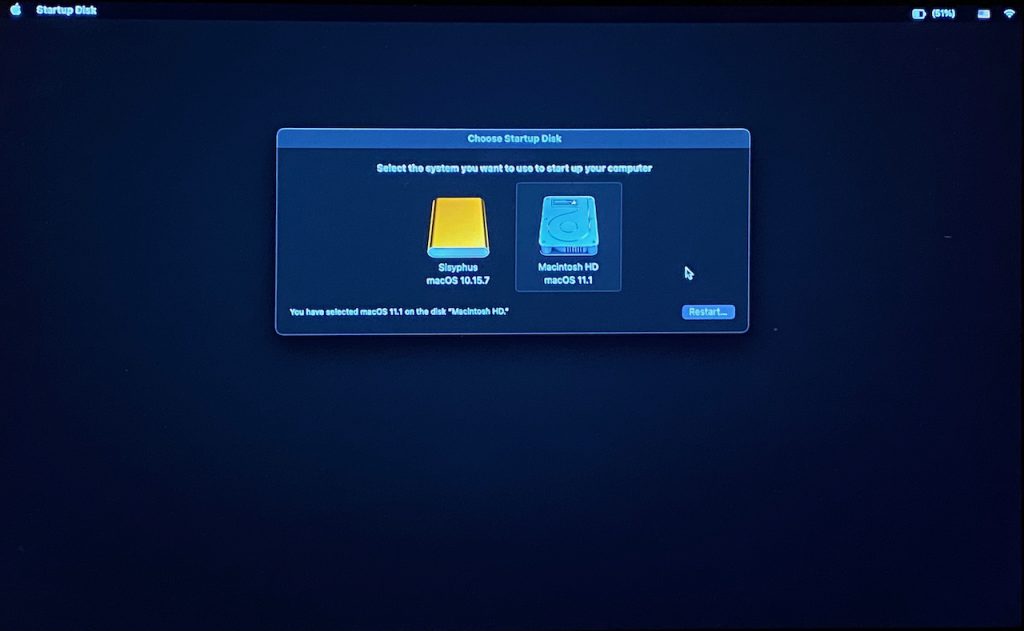
If you work your way into macOS Recovery but then want to back out in order to select a startup drive, look in the Apple menu for a Startup Disk command, which provides similar functionality with a slightly different look.
Startup Manager (but not Startup Disk) also lets you start up in Safe mode and set a drive as the default to use for booting. First, select a drive. Then, for Safe mode, press the Shift key and click the Continue in Safe Mode button below it. To set a selected drive as the default, press the Control or Option key and click the Always Use button underneath it.
Note that M1-based Macs can’t boot from just any external drive. We’re all still learning about the new platform, but it seems that you need a Thunderbolt 3 SSD that has been freshly formatted with APFS and set up with a new installation of macOS 11.1 Big Sur. See Howard Oakley’s writeup for details.
macOS Recovery / Recovery
When you need to reinstall macOS or restore from a Time Machine backup, head to macOS Recovery. From the Startup Manager screen, select Options and click Continue underneath it. After you choose a language, an initial macOS Recovery screen appears. Note that you have access to the Apple menu, which lets you choose Startup Disk, Restart, or Shut Down, and to the Recovery Assistant menu, which includes a potentially useful Erase Mac command.
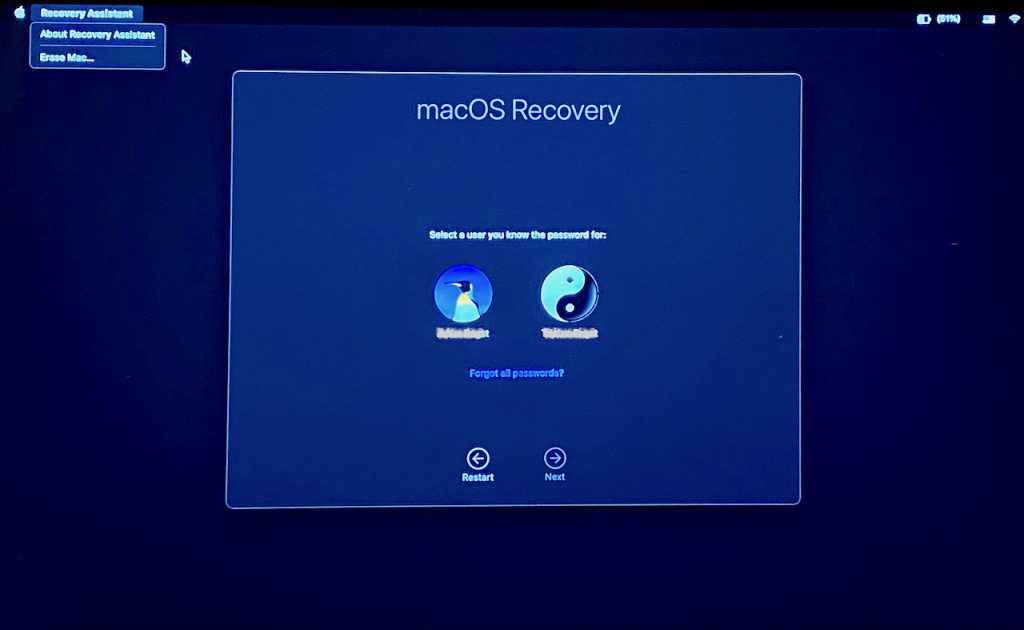
macOS Recovery presents you with a list of users. Select one for which you know the login password, click Next, and enter the password when prompted. Now, in the Recovery app, you can restore from Time Machine, reinstall Big Sur, launch Safari to browse the Web and get online help from Apple, and open Disk Utility to manage drives.
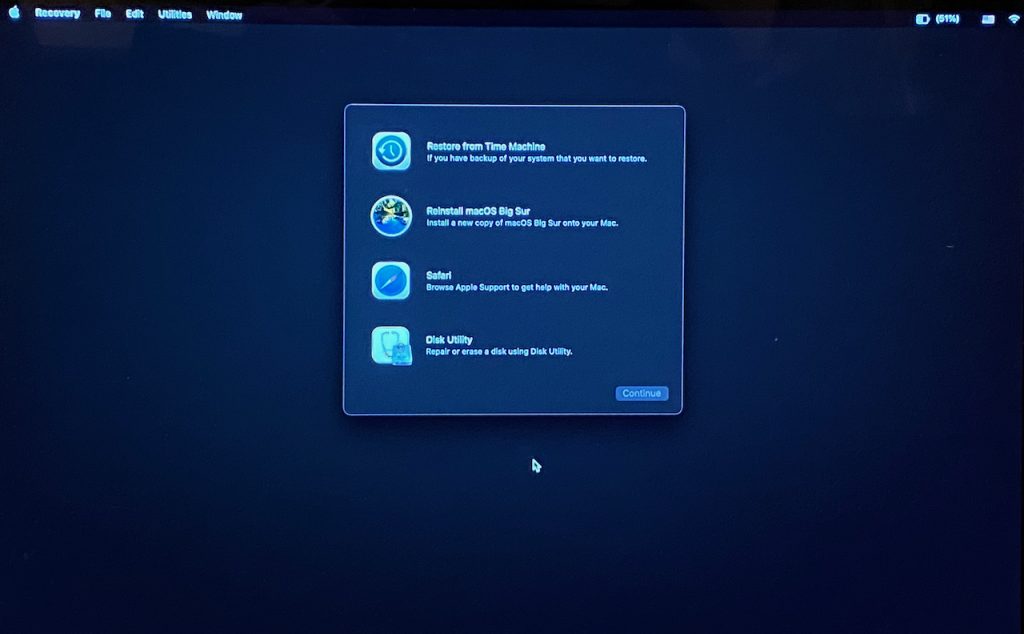
The Recovery app has a full set of menus, and notice Utilities in particular. It lets you launch the Startup Security Utility, to reduce the macOS security level, or Terminal, if you want to run command-line tools before startup. (The old macOS single-user mode accessible by holding down S at startup has disappeared.) To return to the Recovery app from any other app, quit the current app. Finally, note that the Recovery app’s Window menu has an option for Recovery Log. As is often the case with logs, it may be inscrutable to all but high-level support experts.

Oddly, once you’re in macOS Recovery, there’s no way to return to the Startup Manager.
Target Disk Mode / Share Disk
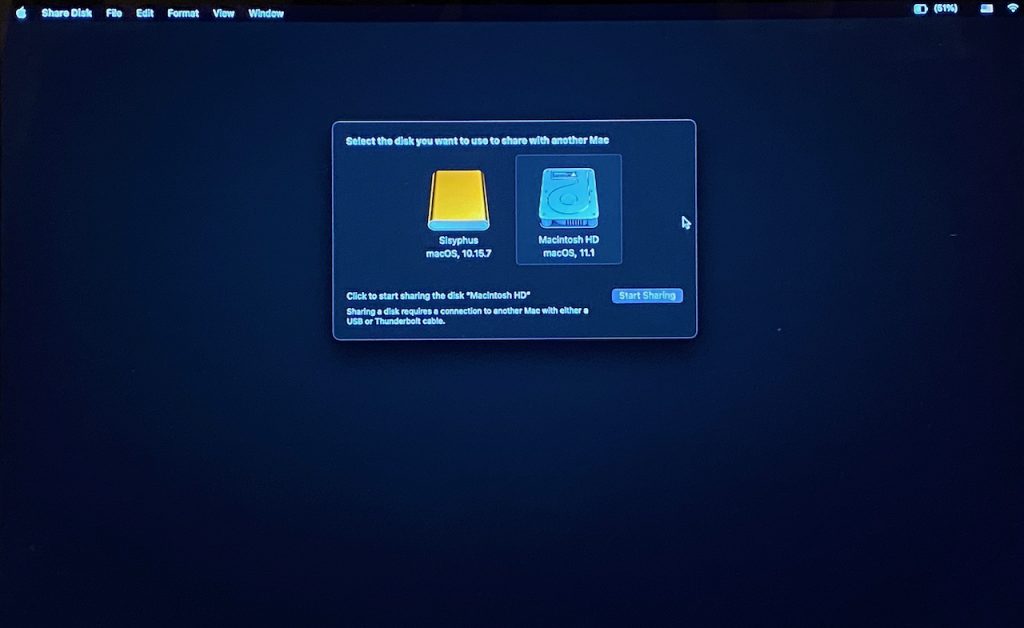
If you ever want to access one Mac’s drives from another, you can connect the two Macs via a USB or Thunderbolt cable and use Target Disk Mode. On M1-based Macs, you initiate Target Disk Mode using a command in the Recovery app’s Utilities menu: Share Disk.
Choose Utilities > Share Disk to start sharing one of the M1-based Mac’s drives via Target Disk Mode. Select the drive and click Start Sharing. When you’re done using it, click Stop Sharing before disconnecting the cable.
Apple Diagnostics / Diagnostics Loader
If you’re worried that your M1-based Mac is suffering from a hardware failure, running Apple Diagnostics may shed some light on the problem. Oddly, getting to Apple Diagnostics still requires a hidden keystroke.
Once you’re in the Startup Manager screen, press and hold Command-D to reboot the Mac into the Diagnostics Loader app. You can choose to run the diagnostics offline or to share the information with Apple.
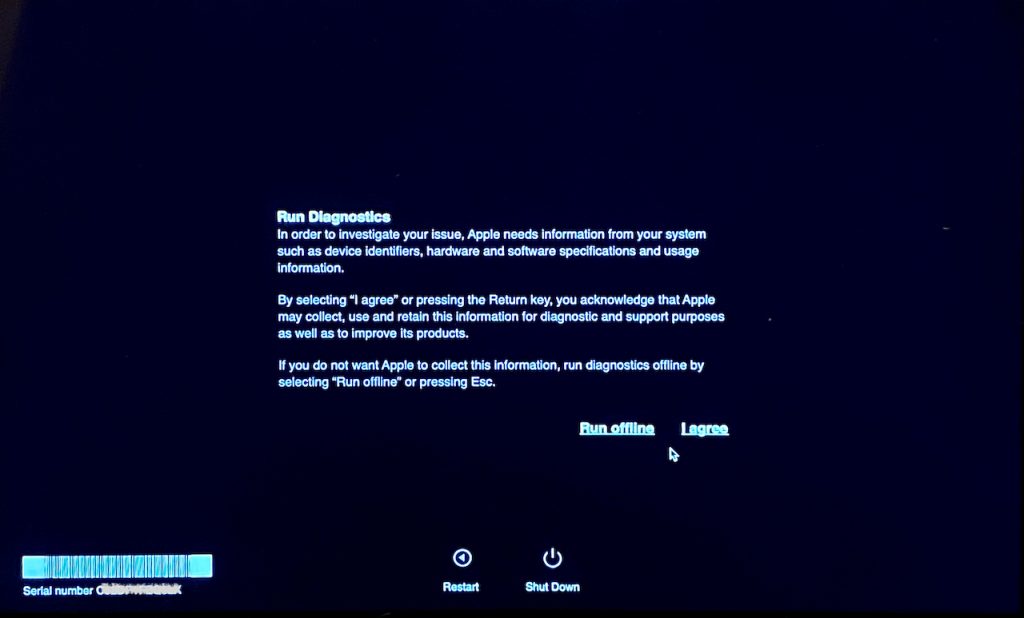
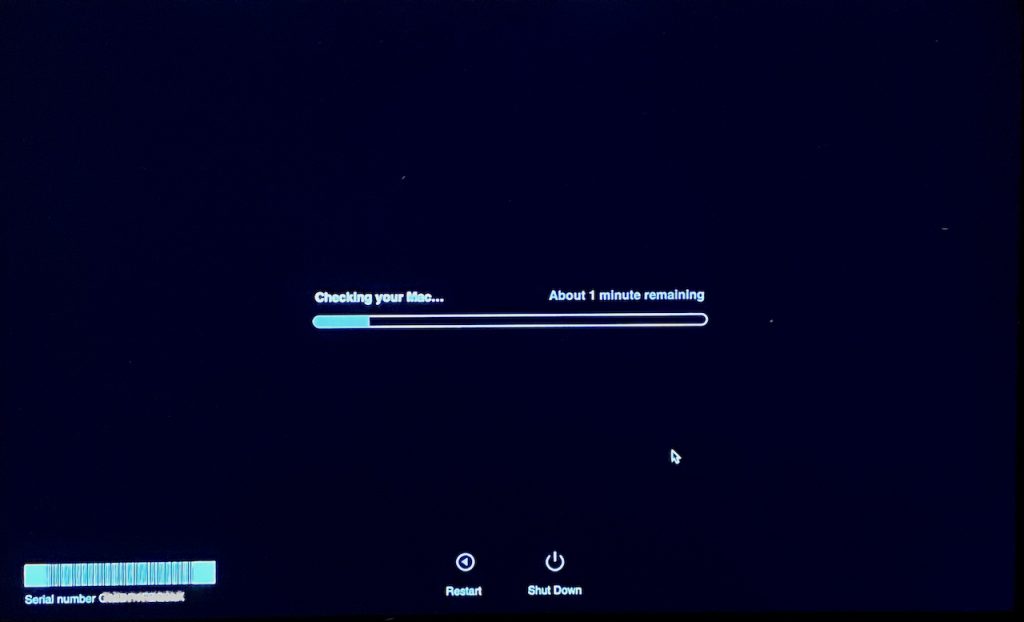
After you pick one, the diagnostics run right away and report back when they’re done. If you have an M1-based MacBook Air or MacBook Pro, make sure to plug it in first, or you’ll get an error telling you that the power adapter couldn’t be found.
The troubleshooting approaches that no longer seem to be available in any way are to reset the NVRAM (Non-Volatile RAM) or the SMC (System Management Controller). Apparently, the NVRAM tests itself at startup and resets automatically if necessary. M1-based Macs reportedly don’t have an SMC in the same way as Intel-based Macs, so there’s no option to reset it.
(Featured image by Apple)
Social Media: Apple’s M1-based Macs change how you switch drives and access troubleshooting tools at startup. Read on to learn the new techniques.