
We all get too much email, and while Mail can’t help you get less (other than by making it easy to unsubscribe from mailing lists), it does provide shortcuts for processing your mail more quickly. Regardless of whether you’re using iOS, iPadOS, or macOS, you can swipe on messages in the message list to perform various actions—some of which you can customize. It’s an efficient way to work through email quickly.
Swiping on the iPhone and iPad
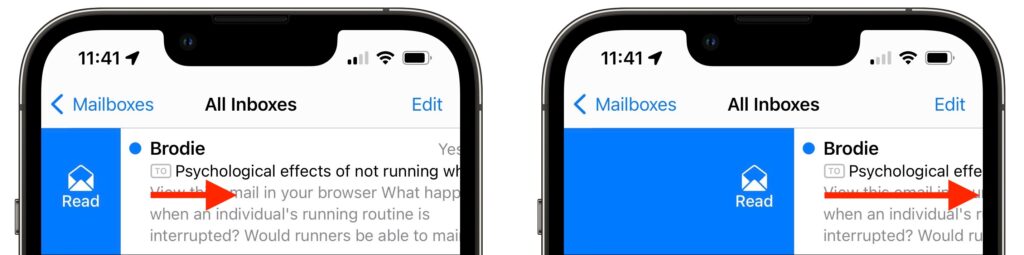
In iOS and iPadOS, when you swipe a short distance right on an unread message (from left to right), Mail displays a Read button. You can either stop swiping and tap it or keep swiping to the right to mark the message as read. If the message has already been read, that button changes to Unread. This swipe is great for those who like marking messages as unread to keep them around for later processing.
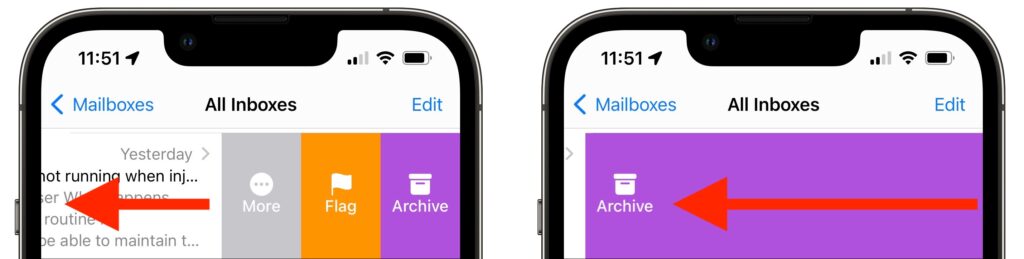
Swipe left (from right to left) a short distance, and you get three buttons, More, Flag, and Archive. (If you see Trash instead of Archive, that’s fine. We talk more about configuring which buttons you see shortly.) Tap Archive to store the message in an Archive mailbox (or All Mail for Gmail users), which is good for getting it out of your face without deleting it. Flag marks the message with a flag so you can find it again easily in Mail’s Flagged mailbox—some people do this to track messages that need replies or other actions. You can also swipe all the way to the left to archive the message with one motion.
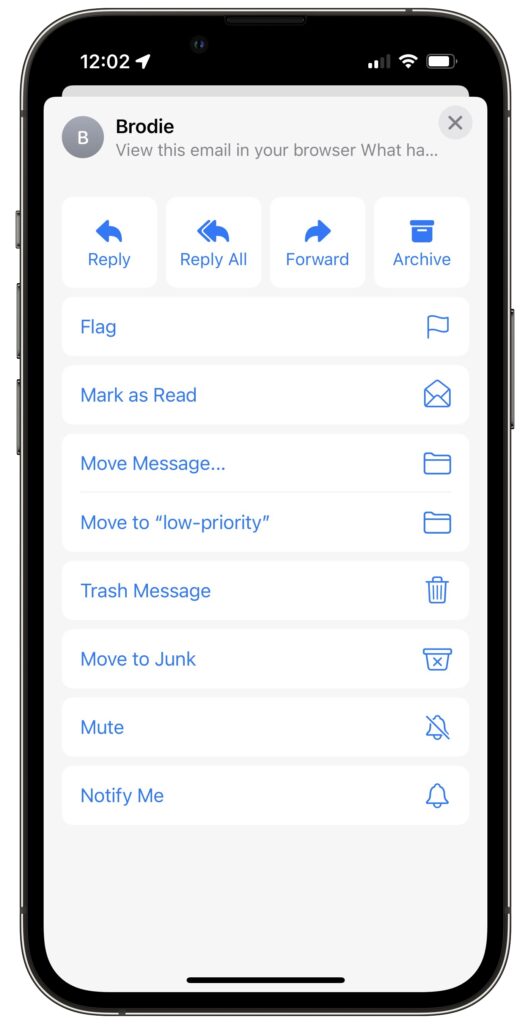
If you tap More, you get a bunch of additional options (depending on the message) that include Reply, Reply All, Forward, Archive, Flag, Mark as Read, Move Message (for filing in another folder), Trash Message, Move to Junk, Mute (to silence notifications from the thread), and Notify Me (which alerts you when anyone replies to the message).
Do you prefer to have your full swipes manage mail in a different way than the default? Go to Settings > Mail > Swipe Options and choose which button appears when you swipe right or left. You can select only one unique action for the middle swipe left button and for the swipe right action.
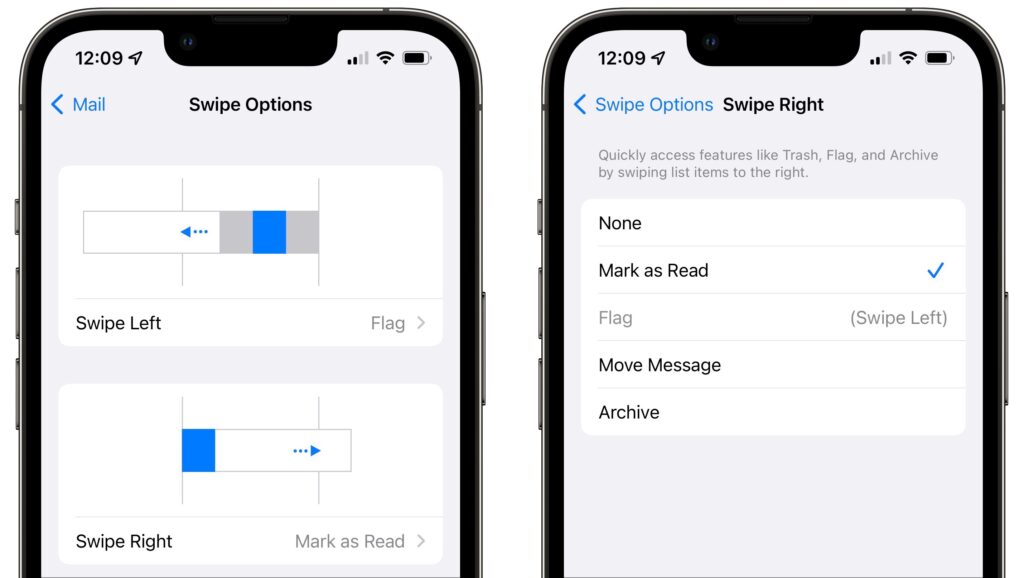
If you prefer to delete messages instead of archiving them, select Archive in the Swipe Right settings and it will become Trash automatically if the account requires swiping left to offer the Archive button. If you use Gmail or some other email providers, you can reverse these settings (so swiping left offers Trash and swiping right gives you Archive) by navigating to Settings > Mail > Accounts > YourAccount > Account > Advanced and selecting Deleted Mailbox under Move Discarded Messages Into.
Remember that you can undo an errant swipe action by swiping left anywhere on the screen with three fingers or by shaking the iPhone or iPad, assuming you’ve left that setting enabled in Settings > Accessibility > Touch.
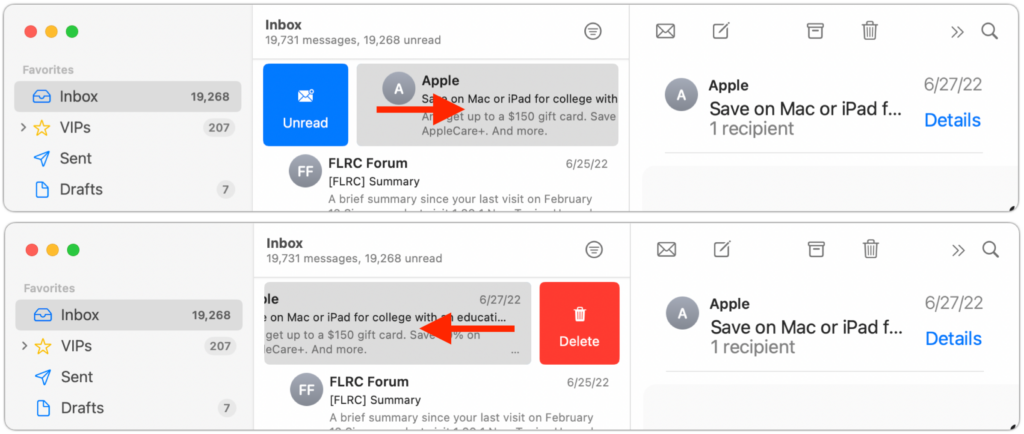
Swiping on the Mac
On the Mac, swiping works similarly, but fewer options are available. You can swipe right with two fingers to mark a message as read or unread, depending on its current status, or you can swipe left to delete or archive the message. Short swipes reveal a button you can click; long swipes perform the action without needing an additional click.
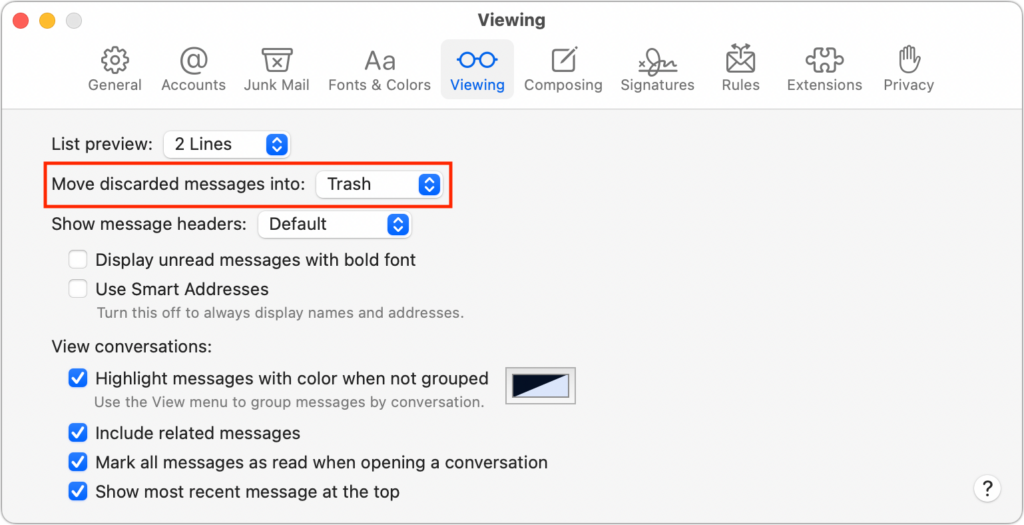
As with Mail in iOS, you can toggle the delete/archive setting by choosing Mail > Preferences > Viewing. Choose Trash or Archive from the Move Discarded Messages Into pop-up menu.
That’s it! Take a few minutes to practice swiping, and before long, you’ll be marking, flagging, and archiving messages with just a flick of the finger.
(Featured image by iStock.com/Pheelings Media)
Social Media: We can’t reduce your email load, but we can show you how to process it faster by swiping on items in Mail’s message list on your iPhone, iPad, or Mac. Details at: